Have you ever bitten into a pastry so divine, it took you right to Switzerland? That’s what making an authentic gipfeli recipe at home feels like. These are not your ordinary croissants. They are lighter, crisper, and uniquely Swiss. This Swiss croissant recipe is simpler than you think. It will teach you to make flaky, crispy-edged delights perfect for any time of day.
If you’ve always wanted to make pastries like a pro or just miss the taste of Switzerland, this gipfeli recipe is for you. Let’s dive into the steps of making a golden, less buttery gipfeli. It’s a tradition in Swiss mornings we’re excited to share.
Key Takeaways
- Discover what makes a traditional Swiss pastry different from French croissants.
- Learn the easy steps needed to create a homemade gipfeli.
- Explore how to master this famous Swiss croissant recipe.
- Find out the care needed for a perfect traditional Swiss pastry.
- See how making a gipfeli recipe can be fun for bakers of all levels.
The Charm of Swiss Baking: Unveiling the Gipfeli
The Swiss croissant magic is not just about taste. It dives into the heart of Swiss baking culture. The gipfeli stands as a key symbol, showcasing the skill of Swiss pastry chefs. Its unique texture and taste make it more than a breakfast item. It’s a cultural icon.
What Defines a Gipfeli: Deciphering its Uniqueness
A gipfeli is known for its light, airy texture, making it unlike the French croissant. Learning how to make gipfeli unveils a commitment to less butter and a crisp finish. These qualities show the Swiss preference for balanced and subtle flavors.
Gipfeli vs. Croissants: Identifying Key Differences
At first look, gipfeli and croissants may seem similar. Yet, significant differences exist. From butter amounts to how they’re layered, these variations matter. They are crucial for mastering gipfeli baking instructions. Here’s a closer look at these differences:
| Feature | Gipfeli | Croissant |
|---|---|---|
| Texture | Light and crisp | Rich and soft |
| Butter Content | Moderate | High |
| Folding Technique | Less complex | More intricate |
For those interested in making gipfeli at home, this guide is perfect. It covers the key steps and skills. This way, you can bring a touch of Swiss charm into your kitchen.
Embark on a Culinary Journey: The Rich History of Gipfeli
The gipfeli history in Swiss culture is rich and meaningful. It’s more than just a breakfast pastry. It comes from the German word ‘Gipfel’ meaning peaks, like those in the Alps. The shape of gipfeli is inspired by these mountains.
It symbolizes Switzerland’s connection to its alpine heritage.
Gipfeli has grown from a rare treat to a daily must-have in Switzerland. People enjoy it with coffee or tea. Its versatility with different fillings keeps it beloved in both cities and the countryside. The story of gipfeli reflects Swiss pastry tradition’s blend of new and old.
This pastry holds a spot at the heart of Swiss life beyond just eating. It’s central to both family gatherings and friendly meet-ups. These moments are not just about food, but about strengthening community bonds.
Seeing a gipfeli reminds one of the Swiss mountains, not just through its shape, but through the depth of culture and tradition it represents in Swiss society.
To dive deeper into gipfeli’s deliciousness, try mixing traditional Swiss flavors with new ideas. A great example is the crookie recipe, combining croissant and cookie.
The story of gipfeli history in Swiss culture keeps evolving. This pastry isn’t just food; it tells the story of Swiss heritage. It shares how Switzerland’s flavors changed over time.
Assembling the Ingredients: Crafting Your Gipfeli
Start your gipfeli with authentic gipfeli ingredients and Swiss pastry ingredients for deep flavors and perfect textures. Use high-quality flour, butter, and yeast to follow Swiss baking traditions closely. Yet, you can still meet modern dietary needs without losing the taste.
Choosing High-Quality Ingredients for Authenticity
Choosing premium ingredients is key for a real gipfeli experience. Pick fine-milled flour from trusted Swiss sources for the right texture. Use high-fat butter and fresh yeast to get those flaky layers and a light crumb, just like traditional gipfeli.
Alternatives and Substitutes for Dietary Needs
An understanding of dietary alternatives in baking is vital for gluten intolerance or dairy sensitivities. Use gluten-free flour mixes as a substitute for wheat flour. This won’t harm the pastry’s build. Try non-dairy milk and vegetable margarine instead of milk and butter, letting everyone enjoy gipfeli’s delicious flavor.
Check out this porridge bread recipe for ideas on healthy swaps in classic recipes. Balancing tradition with health needs lets you make a gipfeli that’s genuine and considerate of dietary restrictions.
Gipfeli Baking Instructions: From Dough to Pastry
Starting the journey of how to make gipfeli means making the perfect gipfeli dough recipe. To get that light and flaky Swiss croissant texture, you need to be exact. We’ll show you how to turn basic ingredients into amazing gipfeli.

The first step in our Swiss croissant baking instructions is making the yeast mix. It’s crucial for the dough to rise. You dissolve yeast in warm milk with some sugar to activate the yeast. Once it’s foamy, you mix it into sifted flour to start the dough. Then, you knead it well to mix everything evenly and develop the gluten.
| Ingredient | Quantity | Function |
|---|---|---|
| Flour | 3 cups | Creates structure |
| Warm Milk | 1 cup | Activates yeast |
| Yeast | 2 tsp | Enables rise |
| Sugar | 1/4 cup | Feeds yeast |
| Butter | 1/2 cup | Provides flakiness |
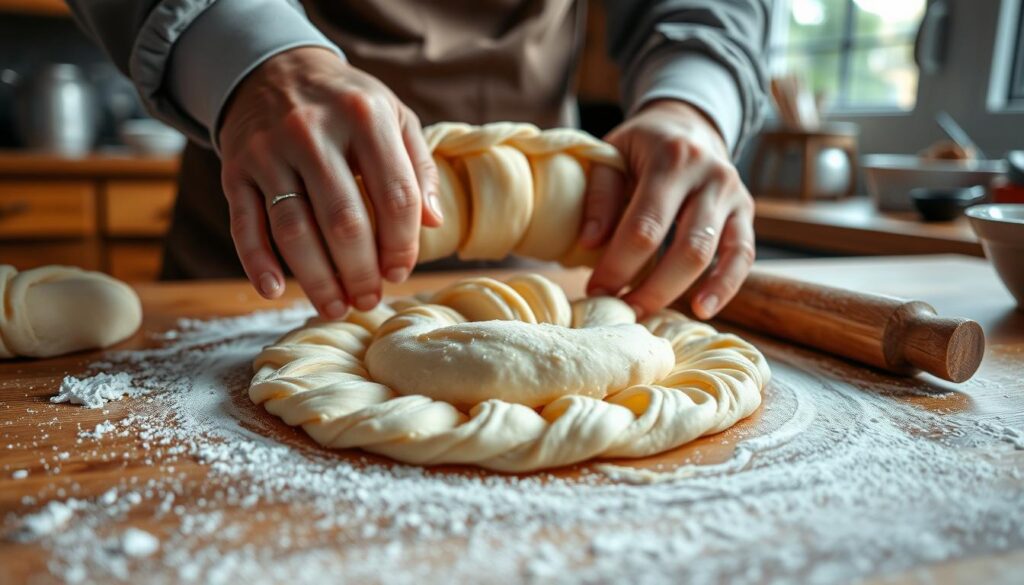
After resting the dough, we begin lamination. This means rolling the dough and folding in butter. It’s key for creating those airy layers gipfeli are known for. Every fold and turn brings us closer to the perfect pastry.
Finding out about this wonderful dessert highlights the lavish texture and taste of gipfeli. You can dive deeper by learning about crab brulee. This mix of sweet and savory offers a unique gourmet experience.
By being patient and precise at every step of this gipfeli dough recipe, you’re on your way to how to make gipfeli. Then, bake them until golden and enjoy your delicious creation.
Mastering the Art of Lamination for Perfect Gipfeli
The art of lamination is key to making authentic homemade gipfeli with a perfect flaky texture. This technique requires carefully working the dough and butter. The goal is to keep the layers separate, which makes a great gipfeli. Let’s dive into how you can achieve this to match the quality of the best Swiss bakeries.
Lamination’s science can boost your baking. It starts with wrapping cold butter in dough. Then, you roll and fold it many times. This spreads the butter and creates thin dough layers. When baked, these layers puff up. This creates the flaky texture we all love in gipfeli.
Simple Steps to Achieve Flaky Layers
- Start with a well-chilled, pliable butter block to prevent it from melting into the dough too quickly.
- Roll out your dough in a cool environment to keep the butter firm.
- Fold the dough systematically, three to four times, with chilling periods in between each fold to maintain the butter’s consistency.
Secrets to Handling Butter in Gipfeli Dough
For the perfect flaky texture in authentic homemade gipfeli, the butter’s temperature and consistency matter a lot. If the butter is too hard, it might tear the dough. Too soft, and it will mix into the dough instead of creating layers. You want the butter to be firm but not hard.
- Use unsalted butter for better control over the saltiness of your pastry.
- Regularly check the firmness of the butter during the folding process.
- Chill your dough with the butter inside it for at least 20 minutes between each fold to ensure the layers don’t meld together prematurely.
Mastering these steps will take your gipfeli to the next level. Not only will they taste authentic, but they’ll also have a delightful, flaky, airy texture. Remember, patience and precision in the art of lamination are essential. They are your keys to creating the perfect batch of authentic homemade gipfeli.
Gipfeli Recipe: Shaping the Iconic Crescent
Making the perfect Swiss crescent pastry begins with the right gipfeli shaping. The way you roll the dough is key. It makes sure each pastry looks the same and bakes evenly. Watch this video to see how it’s done.

Start with your dough on a floured surface. Roll it evenly with a rolling pin. Make sure the edges are even for uniform baking. Next, cut the dough into triangles. The size of each piece affects its baking time and texture.
To shape a gipfeli, start at the wide end of a triangle. Roll it towards the tip. This keeps the layers you made during lamination. Make sure the tip ends under the gipfeli. This stops it from unrolling when it bakes. Done right, your gipfeli shaping will result in pastries that look good and taste great, true to the Swiss crescent pastry.
If you’re interested in how baking techniques vary across cultures, check out other pastries. For more on baking with simple ingredients, see this guide.
Remember, practice makes perfect with gipfeli rolling technique. Each try gets you closer to making those famous Swiss crescents.
Baking Techniques: Ensuring Gipfeli Perfection
To master the art of baking gipfeli to perfection, follow certain steps from start to finish. These steps improve flavor and texture, making each pastry a piece of Swiss pastry perfection.
Prepping Your Oven and Baking Surface
Preparing your oven and baking surface right is key for gipfeli. Make sure to preheat the oven to the recommended temperature. This ensures the gipfeli cooks evenly. Also, line your baking surface with quality parchment paper. This helps with heat distribution and prevents sticking, crucial for gipfeli baking tips.
Achieving the Signature Golden Gipfeli Hue
For the signature golden hue of Swiss pastries, use an egg wash before baking. This adds a glossy look and rich color. Watch the gipfeli closely in the oven to prevent over-browning. Proper monitoring ensures they come out just crispy enough.
Exploring the World of Fillings for Your Gipfeli Recipe
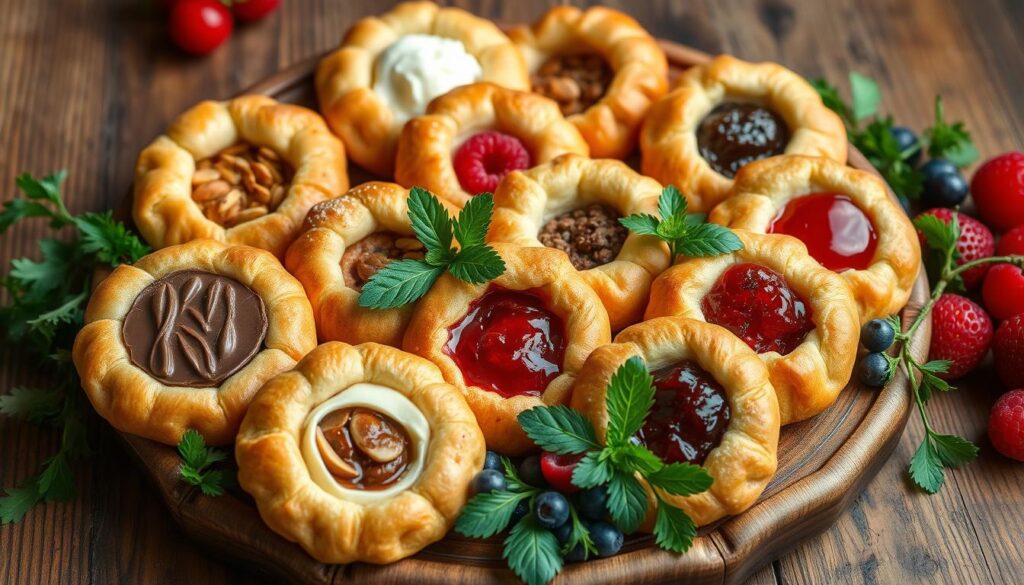
The versatile gipfeli recipe is a treat with its flaky, buttery layers. It also lets us be creative with many fillings. From classic favorites to new ideas, Swiss croissant fillings blend old and new tastes. Let’s look at the fun fillings you can try.
Incorporating Sweet Spreads for a Delightful Surprise
For the sweet tooth, many choices await. You can make your gipfeli an indulgent snack. Try using rich chocolate-hazelnut spreads or sweet almond pastes. These fillings get gooey in the oven and drip with every bite.
Savory Twists: Cheese and Herb Combinations
Aiming for savory? Then, get brave with cheeses and herbs. Think of a gipfeli with melting Gruyère or sharp cheddar. A bit of rosemary or thyme can elevate the flavor. This mix satisfies cravings and adds nutritional value.

| Ingredient | Flavor Profile | Best Used In |
|---|---|---|
| Chocolate-Hazelnut Spread | Sweet, Nutty | Sweet Gipfeli |
| Almond Paste | Rich, Sweet | Sweet Gipfeli |
| Gruyère Cheese | Savory, Creamy | Savory Gipfeli |
| Cheddar Cheese | Sharp, Bold | Savory Gipfeli |
Choosing Swiss croissant fillings that are sweet or savory makes your gipfeli special. Trying new fillings isn’t just fun. It also helps us respect the rich tradition behind these famous flavors.
Conclusion
Making gipfeli is more than just cooking. It’s a trip into Swiss food culture. You pick the ingredients, fold the dough, and bake. These steps connect you to homemade gipfeli delights. This isn’t just about bringing Swiss bakery-quality pastries home. It’s about welcoming Swiss traditions and warmth into your life through these special pastries.
We looked at how to make gipfeli, from picking basic ingredients to mastering baking skills. Our goal was to give you the tools to make real Swiss taste at home. We covered it all to help you bake homemade gipfeli delights. They’ll match the taste you’d find in a Swiss bakery.
For better baking, think about the environment in your kitchen. Things like humidity and how well your oven works matter a lot. They help make the perfect gipfeli sensory experience.
| Ingredient | Role in Quality | Tips for Best Results |
|---|---|---|
| High-gluten Flour | Provides elasticity and strength | Opt for high protein content over 12% |
| Butter | Creates flaky layers | Use cold, unsalted butter for better control |
| Yeast | Essential for rise and flavor | Fresh yeast preferred for subtle flavors |
With these tips, you’re ready to start baking gipfeli. Your kitchen will fill with smells and tastes that bring Swiss traditions to your table.
Make-Ahead Tips for Effortless Gipfeli Enjoyment
Getting your gipfeli dough ready ahead of time doesn’t just save time; it changes the game. It lets you enjoy fresh, home-baked goods without the rush. Some early steps can get delicious gipfeli ready to bake at a moment’s notice.
First off, learning to prepare gipfeli dough in advance is key. You start by mixing and kneading the dough. Then, let it rise once. After that, shape the dough into crescents or any shape you like. Instead of baking right away, wrap the shaped dough and refrigerate. You can do this for up to 48 hours. This step boosts flavor and cuts down on work later.
For extra convenience, try freezing unbaked gipfeli. Place them apart on a baking sheet and freeze until solid. Then, move the gipfeli into a freezer bag or container. Use parchment paper between layers. This way, you’ll have gipfeli ready to bake without thawing, only adding a few minutes to baking time.
| Method | Baking Day Prep Time | Convenience Level |
|---|---|---|
| Refrigeration | 10 minutes (preheat oven, place on baking sheet) | High |
| Freezing | 15 minutes (preheat oven, plus thawing time) | Very High |
For tips on using puff pastry, see how to make an easy and elegant cream cheese puff. It’s great with coffee or as a classy dessert.
Prepped gipfeli dough can change how you cook. It means you’re always set for baking fun, whether it’s for surprise guests or a special homemade breakfast.
Navigating Common Questions Around Gipfeli Recipes
Making your gipfeli at home is very fulfilling. Yet, you might have some questions as you learn the recipe’s specifics. A common question is how gipfeli differ from croissants. While similar in texture and taste, gipfeli are typically denser with fewer layers. This makes them unique in how they feel and taste.
For those looking into gipfeli storage tips, keeping them fresh is crucial. After baking, store gipfeli in a sealed container at room temperature for best crispness. Planning to bake later? You can freeze the dough. Just wrap it well. When ready, thaw it in the fridge, then shape and bake.
When it’s time to serve, consider different gipfeli serving suggestions to please any taste or event. These pastries are great for breakfast with jams and cheeses or filled with sweet surprises for a treat. Add a creative touch with fruits and herbs, similar to a blackberry basil pizza. Savory or sweet, gipfeli are versatile for any meal or dessert, fitting into various dishes.
FAQ
What makes gipfeli different from the regular croissant?
Gipfeli and the French croissant look alike, but gipfeli has its unique charms. It’s lighter and more airy, with crispy edges. Unlike the butter-packed French croissant, the gipfeli uses less butter. This creates a perfect balance between its flaky layers and just the right touch of butter.
Can I use gluten-free flour for a gipfeli recipe?
Absolutely! You can swap in gluten-free flour for the regular kind. This lets you enjoy homemade gipfeli without worrying about gluten. It’s great for those with dietary restrictions.
How important is the lamination process in making gipfeli?
Lamination is key for gipfeli’s flaky texture. This process folds butter into the dough, creating thin, puffy layers. Keeping the butter cold is crucial. It ensures the layers stay separate and flaky.
What is the ideal oven temperature for baking gipfeli?
The right oven temperature is crucial for baking. For gipfeli, aim for around 400°F (200°C). Always double-check your recipe for the best temperature guide.
Can I prepare gipfeli dough ahead of time?
Yes, preparing gipfeli dough ahead is possible. Just divide, shape, and then wrap it. You can keep it in the fridge or freeze it until baking time. This tip is handy and keeps your gipfeli tasty.
What fillings can I incorporate into my gipfeli recipe for a fresh twist?
Get creative with gipfeli fillings to match your taste. Add sweet almond paste or chocolate-hazelnut spread for a treat. Or go savory with cheese and ham. Gipfeli is versatile, meeting all flavor preferences.
How should I store baked gipfeli to maintain their freshness?
Keep your gipfeli fresh in an airtight container at room temperature for a few days. For longer storage, freezing is an option. Thawing might change their texture a bit though.
Is it possible to freeze unbaked gipfeli?
Yes, you can freeze unbaked gipfeli. First, freeze them on a baking sheet. Then, store them in a freezer bag or container. For baking, thaw in the fridge, then proof and bake as usual.
Are there any key points to remember when shaping gipfeli?
Roll the dough evenly for uniform thickness. Cut it into triangles, then roll from wide to narrow end. This keeps the layers intact and forms the gipfeli’s crescent shape. Avoid pressing the dough too much to preserve the layers.
What type of milk is best to use in a gipfeli recipe?
Whole milk is the traditional choice for its richness and flavor in the dough. If you prefer, non-dairy milks like almond or soy are good alternatives. They make your gipfeli just as delicious.

Classic Gipfeli Recipe
Equipment
- Large mixing bowl
- Rolling Pin
- Baking sheet
- Parchment paper
- Pastry brush
- Plastic wrap
- Sharp knife or pizza cutter
Ingredients
- 2 1/4 cups All-purpose flour
- 1/4 cup Granulated sugar
- 1 tsp Salt
- 1 packet 7g Instant yeast
- 1/2 cup Warm milk
- 1/4 cup Warm water
- 1/4 cup Unsalted butter softened
- 1/2 cup Cold unsalted butter cut into thin slices
- 1 Egg beaten, for egg wash
Instructions
- In a large mixing bowl, combine the flour, sugar, salt, and instant yeast.
- Add the warm milk, warm water, and softened butter. Mix until a soft dough forms.
- Knead the dough on a lightly floured surface for about 5-7 minutes until smooth and elastic.
- Cover the dough with plastic wrap and let it rest for 10 minutes.
- Roll out the dough into a rectangle about 1/2 inch thick.
- Place the cold butter slices evenly over one half of the dough. Fold the other half over the butter and press the edges to seal.
- Roll the dough out again into a rectangle, fold it into thirds like a letter, then wrap it in plastic wrap and refrigerate for 30 minutes.
- Repeat the rolling and folding process two more times, chilling the dough in between.
- After the final roll, cut the dough into triangles using a sharp knife or pizza cutter.
- Roll each triangle from the wide end to the tip to form a crescent shape and place on a parchment-lined baking sheet.
- Cover and let rise in a warm place for 1 hour or until puffy.
- Preheat the oven to 375°F (190°C). Brush each Gipfeli with the beaten egg.
- Bake for 15-20 minutes or until golden brown and flaky.


1 Comment
My family loved this!