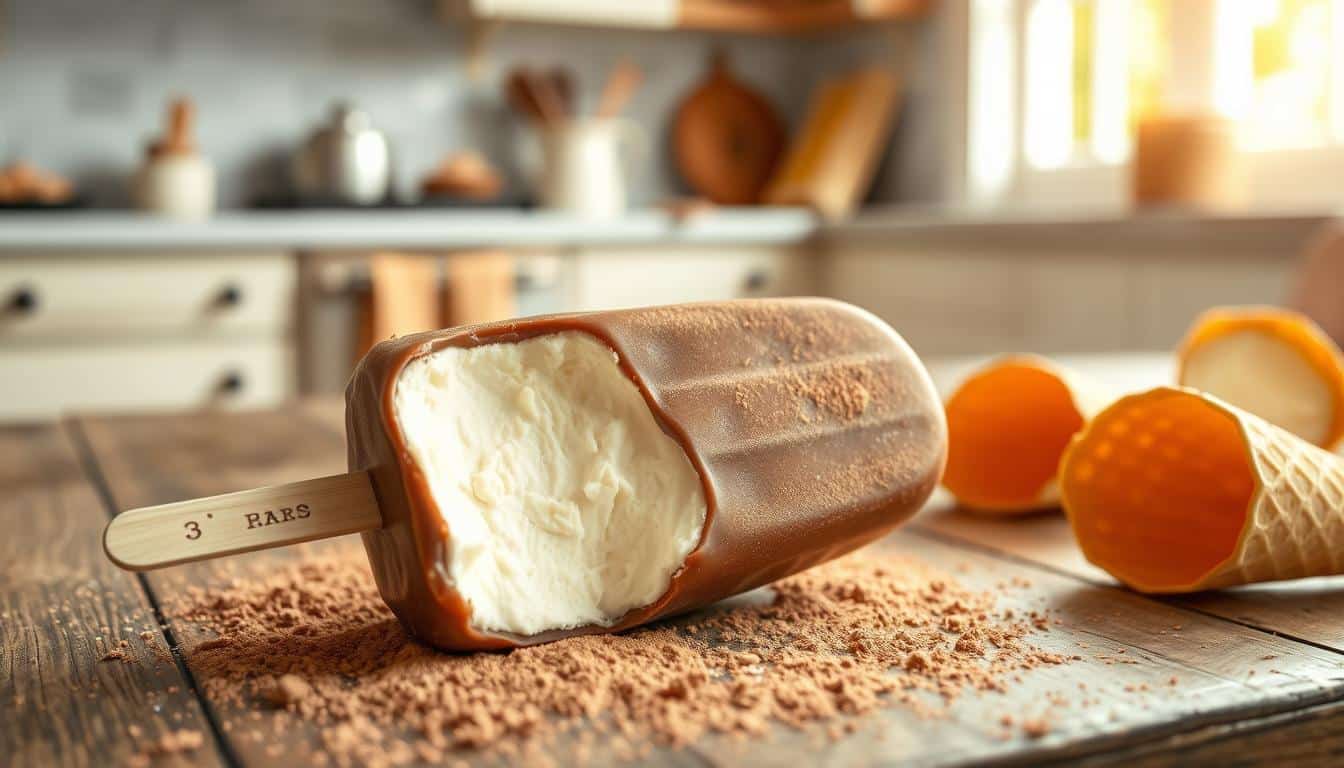
Experience the joy of making the best homemade eskimo pie popsicle recipe. This timeless summer treat has won hearts for many years. As summer nears, make your kitchen a place of sweet escape. Enjoy the delight of crafting a popsicle that fits your taste perfectly. When you take a bite, you’ll see you’ve made more than just a treat; you’ve made a precious memory.
Making this dessert is simple and fun. With a homemade popsicle recipe, you get to pick top-notch ingredients. This makes each bite truly special. Make them for family fun, summer get-togethers, or just to treat yourself. Going homemade means better quality and flavors that you really like.
Key Takeaways
- Embrace the creation of the best homemade eskimo pie popsicle recipe.
- Rediscover a classic summer dessert with a personalized twist.
- Experience the joy of choosing your favorite ingredients for your homemade popsicle recipe.
- Understand how the homemade route enhances the flavor and quality of your dessert.
- Learn the satisfaction of creating treasured moments with each homemade treat.
The Appeal of Crafting Your Own Frozen Treats
Making your own DIY popsicle is very rewarding. You get more than just the joy of a cold treat on a hot day. It’s a fun way to boost your cooking skills too.
Tailoring to Your Taste with Custom Ingredients
Creating your own frozen treat recipe is exciting. You have complete freedom to mix in anything from fruits to creams. Your options are endless, making each popsicle uniquely yours.
Imagine choosing your favorite fruits, herbs, or even some liqueur for your DIY popsicle. This freedom lets you create a popsicle that perfectly suits your taste.
Benefits of Homemade vs Store-Bought Popsicles
Store-bought popsicles might be easy to grab, but they often have artificial flavors and preservatives. Homemade popsicles are a healthier choice, filled with real flavors and natural ingredients.
Understanding these differences highlights the pluses of making your own:
| Aspect | Homemade Popsicle | Store-Bought Popsicle |
|---|---|---|
| Ingredients Quality | Complete control over natural and fresh ingredients | Oftentimes contains additives and synthetic components |
| Flavor Options | Unlimited, customizable based on personal preference | Limited to available commercial flavors |
| Cost-Effectiveness | More economical in the long run | Repeated purchases can be costly |
| Fun Factor | Interactive, enjoyable activity with family and friends | None, typically a straightforward purchase |
Choosing top-quality ingredients for your dessert doesn’t just make it taste BETTER. It makes your snack healthier as well. Making your own popsicle means you’re looking out for both your taste buds and your health.
Essential Tools and Ingredients for the Perfect Popsicle
Start your homemade ice cream bar by collecting the right tools and top-quality ingredients. To make a best homemade Eskimo pie popsicle recipe, picking top ingredients and having the right equipment is key.
Selecting Quality Chocolate and Ice Cream
For an indulgent treat, choosing the right chocolate and ice cream is key. Use semi-sweet chocolate chips or bar chocolates cut into small pieces. They melt smoothly for a rich taste. Add coconut oil to make the mixture easier to work with. Choose ice cream flavors that stay creamy when frozen.
Combining these carefully will create a homemade ice cream bar that’s as good as any store-bought popsicle.

After picking your chocolate and ice cream, melt the chocolate carefully. Then layer it with your ice cream picks. Doing this well makes a treat that’s tasty and looks professional. It brings the Eskimo pie experience right to your kitchen.
- Semi-sweet chocolate or chopping fine quality chocolate bars
- Coconut oil (optional, for smoother melting)
- Your choice of quality ice cream
- Popsicle molds or small paper cups
- Popsicle sticks for handling
- Freezer with enough space for molds
- Microwave-safe bowl or double boiler for melting chocolate
Having these tools and ingredients ready will help you make the best homemade Eskimo pie popsicle recipe. Impress everyone with a refreshing, flavorful treat.
How to Make the Best Homemade Eskimo Pie Popsicle Recipe
Starting the perfect homemade popsicle recipe means picking your top ice cream. Let it soften a bit for easy shaping. Follow this guide to make amazing frozen treats.
- Begin by softening your ice cream until it’s easy to mold. This helps it fill the molds seamlessly.
- Add things like nuts, chocolate chips, or fruit to make your best homemade eskimo pie popsicle recipe tastier.
- Then, insert sticks straight into the molds’ center. This makes them easier to hold and eat.
- Let the popsicles freeze solid, which usually takes 4-6 hours.
As the popsicles freeze, get your chocolate coating ready:
- Mix quality chocolate and a little coconut oil in a microwave-safe bowl. Heat in 30-second bursts, stirring until smooth.
- You can add vanilla or a pinch of sea salt to the chocolate to boost the taste.
When your popsicles are fully frozen, it’s time for the best part:
- Take the popsicles out of their molds.
- Quickly dip each one in the melted chocolate for an even coat. The chocolate hardens fast, creating a crunchy shell.
- Put them back in the freezer for a few minutes so the chocolate sets. Then, they’re ready to enjoy!
By following these steps, you’ll get an amazing homemade popsicle recipe. It brings together creamy ice cream and crisp chocolate. And it’s all made in your kitchen.
Decadent Chocolate Coating: Preparing Your First Layer
Creating a delicious chocolate coating is key for a great summer dessert. It’s perfect when making a frozen treats recipe for gatherings or to fulfill a sweet tooth. Here, we’ll talk about melting chocolate for homemade Eskimo Pie Popsicles.
Melting Techniques for Smooth Chocolate Coverage
To get a smooth and rich chocolate layer, mix quality chocolate with a bit of coconut oil. Chop the chocolate into small pieces to melt evenly. Then, put it in a microwave-safe bowl and mix in a tablespoon of coconut oil per cup of chocolate. This blend gives your chocolate a nice flow and a shiny look, making your popsicles stand out.
Microwave the mix for 20-30 seconds at a time, stirring after each. Keep going until the chocolate is completely smooth. This slow heating stops the chocolate from burning and keeps it just right for coating your popsicles.
Now, let’s cover the popsicles with chocolate. You can drizzle it with a spoon or dip the popsicles straight in. Shake off extra chocolate for a tidy layer. Freeze them again to set before you serve.
Looking for more recipe ideas? Check out tasty seafood dishes that include canned crab meat. It’s great with many tastes and meals.
Using this chocolate prep for your Eskimo Pie Popsicle will make it tastier and look pro. Enjoy making it and the happy faces it’ll bring!
Filling Your Molds: Tips and Tricks
Making the perfect DIY popsicle is a mix of fun and skill. Start by adding your soft ice cream to the molds. Use a spatula to make the top smooth and get rid of air holes. This will make your homemade dessert look sleek once frozen.
If you want to make your DIY popsicle even better, add extra stuff before freezing. Mixing in crushed cookies, nuts, or fruit can add great textures and flavors. This makes each popsicle special. Here’s how to add fun ingredients effectively.
| Add-In Type | Recommended Quantity | Best Combinations |
|---|---|---|
| Crushed Cookies | 1/4 cup | Vanilla ice cream, Chocolate chips |
| Chopped Nuts | 1/4 cup | Pistachios with Mint, Almonds with Cherry |
| Fresh Fruit | 1/3 cup | Blueberries with Cream, Mango Chunks with Coconut |
Make sure the molds are full but not too full. This stops popsicles from getting too big and sticking out. That would make them hard to take out clean.
Tip:
After filling, tap the molds on the counter. This gets rid of air holes. Smooth the top with a spatula for a neat layer. Now, it’s ready to freeze perfectly.
Mixing It Up: Customizable Add-Ins for Your Popsicles
Making popsicles at home is fun, especially when you can personalize them. It’s delightful to create an easy homemade dessert that caters to your taste. Adding unique ingredients transforms each popsicle into a special treat. Whether you want a summer dessert or just wish to try something new.
Incorporating Nuts, Fruit, and Cookie Pieces
Think about enjoying your popsicle and finding unexpected textures and flavors. Adding nuts gives a rich crunch, while berries offer a sweet burst. These ingredients make every bite exciting. Here are some favorites:
- Chopped almonds or pecans for a nutty crunch
- Fresh or frozen berries like strawberries, blueberries, and raspberries
- Crushed cookies or graham crackers for a sweet, crumbly texture
These add-ins not only boost flavor but also create a fun texture contrast. They turn a simple popsicle into an easy homemade dessert you must try.
Layering Flavors for a Gourmet Twist
Layering flavors makes your popsicles gourmet. By pairing different tastes, you create complex, sophisticated treats. It’s like an adventure for your taste buds.
| Base Flavor | Suggested Add-Ins | Expected Flavor Profile |
|---|---|---|
| Vanilla Ice Cream | Mint leaves and dark chocolate chips | Refreshing with a rich, indulgent undertone |
| Chocolate Ice Cream | Cherries and chunks of fudge brownie | Sweet and decadent with tart highlights |
| Coffee Ice Cream | Toasted coconut and caramel swirls | Aromatic with a sweet, creamy texture |
Trying these mix-ins can turn your summer dessert into a moment of joy. It’s a fun way to welcome the season. Each lick is filled with delight and flavors.


Perfecting the Freezing Process
Getting the freezing right is key for a top-notch homemade ice cream bar. A big part of making an amazing best homemade eskimo pie popsicle recipe lies in the freeze. It’s not just about how you make it.
Avoiding Common Freezer Pitfalls
To keep freezer burn and ice crystals away, cover your molds well. Use cling film or airtight molds for best results. Freezer burn and ice crystals form when air hits the moisture in your ice cream, spoiling texture and taste.
It’s crucial to freeze your popsicles for 4 to 6 hours, better yet, overnight. This way, they fully harden, offering a solid texture that doesn’t melt too fast when eaten. If you rush, your homemade ice cream bar may end up too soft or melty.
For a fresh take on typical recipes, check out this resource. It’s full of creative ideas to boost your popsicle’s flavors and looks.
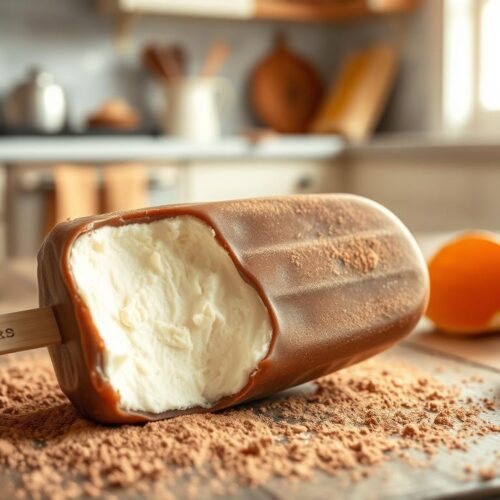
The Thrill of Unmolding: Revealing Your Popsicle Masterpiece
Unveiling your homemade popsicle recipe is both exciting and rewarding. It marks the end of making and the start of enjoyment.

Taking the DIY popsicle out of its mold shows off its flavors and textures. Imagine seeing the chocolate shell and tasting the creamy center. To get it out smoothly, run the mold under warm water briefly. This trick releases the popsicle without melting it, making it a key step in homemade popsicle making.
For those who love to try different flavors, unmolding is super thrilling. It’s a chance to see your creativity in action. Whether it’s a simple vanilla flavor or bold mint chocolate chip, each popsicle is a unique creation.
Here’s a guide to help you unmold popsicles perfectly every time:
| Mold Material | Run Water Temp (°F) | Time Under Water (sec) |
|---|---|---|
| Plastic | 95 | 20 |
| Silicone | 110 | 15 |
| Metal | 100 | 25 |
Looking to try new flavors? Check out unique recipes that mix ice cream with amazing flavors. It’s a great way to test your popsicle-making skills with different tastes and textures.
Remember, unmolding isn’t just a step — it’s showing your dedication to making gourmet popsicles at home. Each time you successfully unmold, you’re getting better at making popsicles!
Flavor Variations: Beyond Vanilla
Making your own frozen treats lets you explore new flavors. You can try lots of different ice cream types to make special Eskimo Pie popsicles. They will be perfect for anyone and any time.
Experimenting with Seasonal and Gourmet Ice Cream Flavors
The seasons are a great starting point for your frozen treat ideas. Here is how to pair your homemade creations with the season:
- Spring: Think fresh and floral flavors such as lavender or rose.
- Summer: Opt for fruity bursts like lemon zest, peach, or watermelon.
- Fall: Introduce richer tastes such as pumpkin spice or maple walnut.
- Winter: Delight in decadent options like peppermint or gingerbread.
Gourmet flavors make your treats extra special. Salted caramel, tiramisu, and matcha green tea are great for a luxury taste.
| Season | Recommended Flavor |
|---|---|
| Spring | Lavender |
| Summer | Peach |
| Fall | Pumpkin Spice |
| Winter | Gingerbread |
A little creativity can turn your treat into a special experience. It can be a cozy fall flavor or a cool summer dessert. With your imagination, the flavor choices never end.
Conclusion
Making your own best homemade eskimo pie popsicle recipe is very joyous and rewarding. It lets you customize flavors to your liking. This path of crafting a homemade ice cream bar invites creativity and fun into your kitchen.
Creating a DIY popsicle feels like a big win. It can be healthier and more tailored than store-bought ones. Every step, from choosing flavors to the chocolate coat, is a creative journey.
Explore various flavors, from classic vanilla to vibrant fruits or deep chocolate. Tasty homemade treats bring unique flavors and build joyous memories with each bite.
This popsicle project is exciting for both newbies and experienced cooks. On hot days or for special events, having your best homemade eskimo pie popsicle recipe means you can make any occasion sweeter and more personal.
Crafting Memorable Moments with Homemade Eskimo Pie Popsicles
Making a homemade popsicle is more than creating a treat. It’s about making lasting memories. Choosing ingredients with your family or enjoying the process together adds a special touch. These moments make home-made Eskimo Pie Popsicles taste better than anything you can buy.
The process is a journey filled with excitement. From picking the best chocolate to watching popsicles freeze, it’s all thrilling. Imagining the flavors that await adds to the fun. Finally, seeing your creation is deeply satisfying. Making these popsicles is a joyful act of love.
When it gets warmer, these desserts are perfect for gatherings. They not only cool us down but also bring us together. Each recipe adds to our collection of memorable moments. Eskimo Pie Popsicles are not just snacks. They symbolize joy, creativity, and quality time with loved ones.
FAQ
What makes homemade Eskimo Pie Popsicles better than store-bought ones?
Homemade Eskimo Pie Popsicles let you choose your own ingredients for a special flavor. You can pick top-notch ingredients and skip the unwanted additives found in commercial ones.
What are the essential tools needed to make homemade Eskimo Pie Popsicles?
You’ll need molds or small cups, sticks, a bowl or double boiler, a freezer, and a spoon. These help you create the perfect popsicle with a chocolate shell.
How do I select the best chocolate for my homemade Eskimo Pie Popsicle recipe?
Go for high-quality semi-sweet chocolate; it melts smoothly and tastes great with ice cream. Adding coconut oil makes the chocolate even silkier.
Can I add mix-ins to my Eskimo Pie Popsicle? If so, what kind?
Yes! Mix-ins like nuts, cookies, or fruit pieces make your popsicles tastier. It’s a great way to make them your own.
What is the best way to avoid freezer burn when making popsicles?
Cover your popsicle molds well with wrap or foil before freezing. A solid freeze, from 4 to 6 hours or ideally overnight, ensures they’re smooth.
How can I easily unmold my homemade popsicles without breaking them?
Hold the molds under warm water for seconds to loosen the popsicles. Wiggle the sticks gently. If stuck, use more warm water.
Are there any tips for achieving a smooth and decadent chocolate coating?
Melt your chocolate in brief spurts in the microwave, stirring frequently. Coconut oil can give it a fancy, shiny finish.
How can I incorporate a variety of flavors into my homemade Eskimo Pie Popsicles?
Try different ice cream and chocolate pairings. Mixing them can lead to exciting flavors for any occasion.
Is it necessary to have special equipment to make homemade Eskimo Pie Popsicles?
No special tools needed—you can even use small cups and anything stick-like at home. Being creative works just as well.
What’s the best way to involve kids in making Eskimo Pie Popsicles?
Kids love choosing ice cream and mix-ins. Have them help fill molds and dip into chocolate. Watch them with the hot chocolate and freezer, though.
Source Links
- https://medium.com/@rakeshchand1211 – recipee in nature – Medium
- https://ethnojunkie.com/ZNmWh/?cat=21&paged=9 – Sweets | Ethnojunkie | Page 9
- https://medium.com/@rakeshchand1211/homemade-eskimo-pie-popsicle-recipe-a-fun-and-easy-treat-a90e4164ef2c – Homemade Eskimo Pie Popsicle Recipe: A Fun and Easy Treat

Homemade Eskimo Pie Popsicle Recipe

Equipment
- Popsicle molds
- Popsicle sticks
- Mixing bowls
- Whisk
- Baking sheet lined with parchment paper
- Microwave-safe bowl or double boiler
Ingredients
- 2 cups Heavy cream
- 1 cup Whole milk
- 3/4 cup Granulated sugar
- 1 tsp Vanilla extract
- For the Chocolate Coating:
- 2 cups Dark or milk chocolate chips
- 2 tbsp Coconut oil or vegetable oil
Instructions
- Prepare the Ice Cream Filling: In a mixing bowl, whisk together the heavy cream, whole milk, granulated sugar, and vanilla extract until the sugar is fully dissolved. Pour the mixture into popsicle molds, insert popsicle sticks, and freeze for at least 6 hours or overnight until fully set.
- Melt the Chocolate Coating: In a microwave-safe bowl, melt the chocolate chips and coconut oil in 30-second intervals, stirring in between, until smooth. Alternatively, use a double boiler to melt the chocolate over simmering water.
- Unmold the Popsicles: Remove the popsicles from the molds by briefly running warm water over the outside of the molds to loosen them.
- Coat the Popsicles: Dip each frozen popsicle into the melted chocolate, turning to coat evenly. Allow any excess chocolate to drip off, and place the popsicles on a parchment-lined baking sheet.
- Set the Chocolate Coating: Place the coated popsicles back in the freezer for 10 minutes to set the chocolate. Serve immediately or store in an airtight container in the freezer for up to 2 weeks.